Why CloudPanel
Why might you want to install a Discourse Forum on a VPS or Dedicated Server running CloudPanel?
Here are my reasons:
I prefer to use a graphical interface for server and site administration. I’ve used most of the web hosting control panels at one time or another.
In comparison to the rest, CloudPanel is very slim and minimal and uncluttered. It has every feature I need, presented very simply and intuitively. And that’s it. It has nothing I don’t need.
I develop and host and manage many Ghost blogs, Wordpress sites, Drupal sites, and other types of sites in addition to Discourse forums. I really only need one server where I can host my Discourse forums right along side my Ghost Blogs and my Wordpress and Drupal sites. (I don’t want to pay for and maintain a separate server for each instance of Discourse.)
CloudPanel includes (right out-of-the-box) built-in Nginx and a simple interface for setting up and managing Reverse Proxies which are necessary in order to run one or more instances of Discourse on the same server or with other types of websites.
The Discourse team (and the Meta forum staff here) do not provide support for alternative server environments like Cpanel or Plesk or (as in this case) CloudPanel, or others that rise up out of the command line.
So I thought I’d share my setup and my process in case there are others who might find it useful.
Install Docker
In Putty (or other terminal), from the root directory, run…
curl -fsSL https://download.docker.com/linux/ubuntu/gpg | sudo gpg --dearmor -o /usr/share/keyrings/docker-archive-keyring.gpg
echo "deb [arch=amd64 signed-by=/usr/share/keyrings/docker-archive-keyring.gpg] https://download.docker.com/linux/ubuntu focal stable" | sudo tee /etc/apt/sources.list.d/docker.list > /dev/null
sudo apt update
sudo apt-get install docker-ce docker-ce-cli docker-compose containerd.io
Create a Reverse Proxy Site in CloudPanel
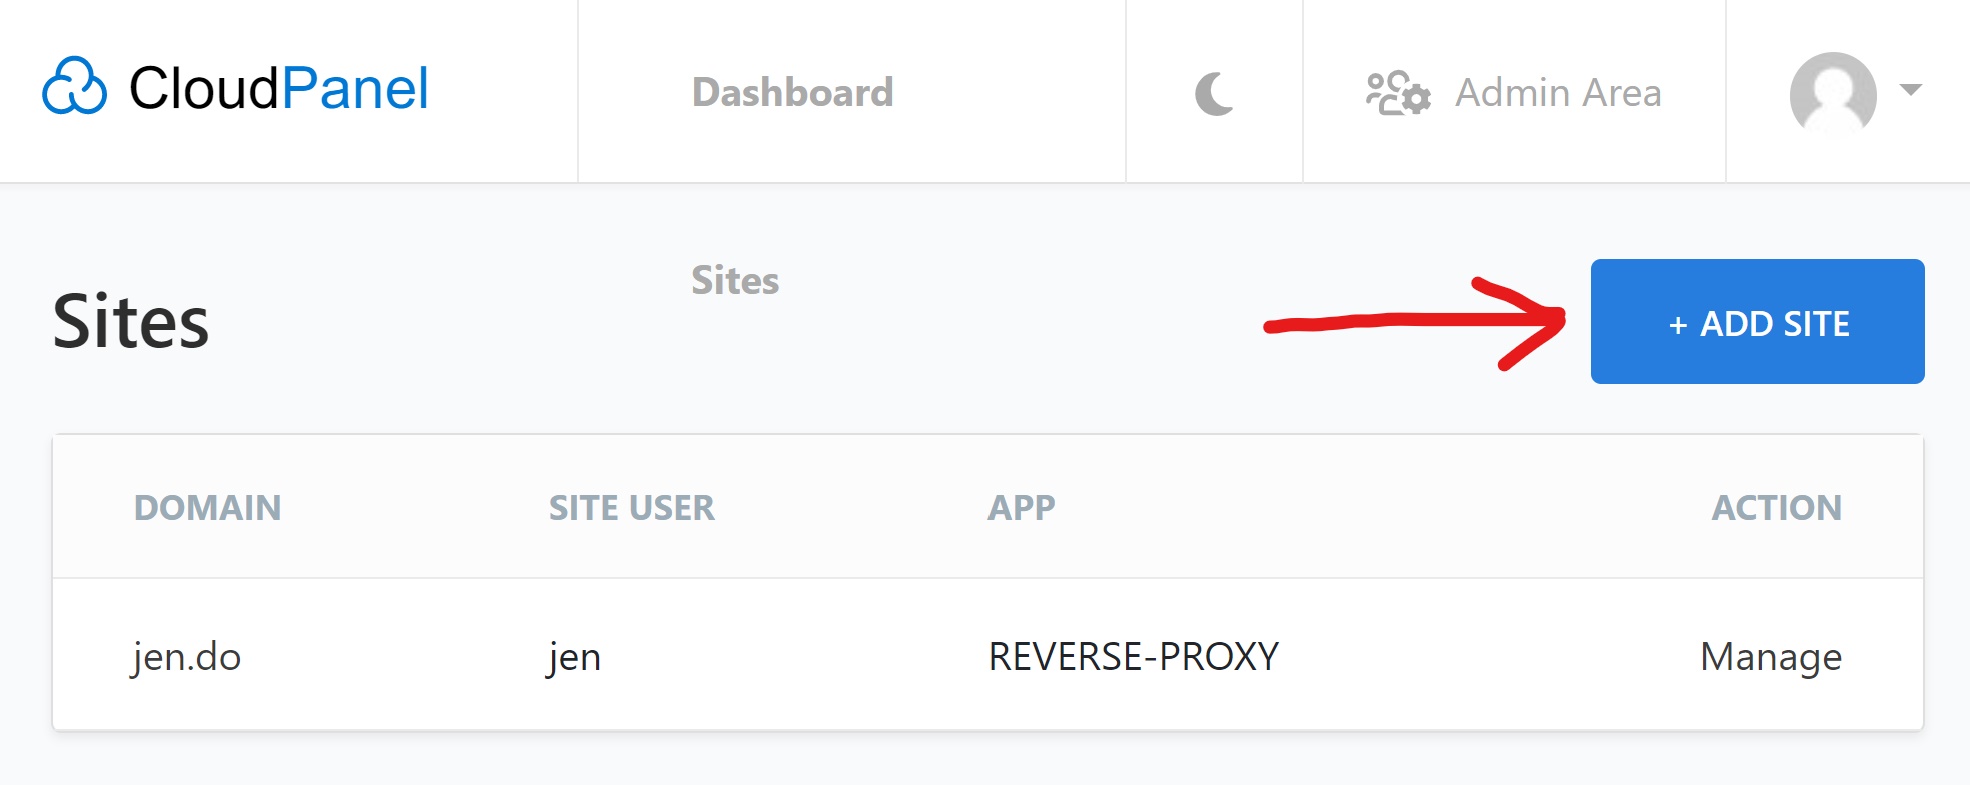
→ We click the + Add Site button…
For my Discourse instance I am using my domain name noobish.me, so from now on wherever you see that in the rest of these instructions, replace noobish.me with your actual domain name (for example, yoursite.com)
→ We create a new “Reverse Proxy Site” in the CloudPanel for the domain where we want to host our Discourse forum (of course the DNS A record of the domain needs to be pointing to the same IP address as our CloudPanel.)

Prepare the Domain and Set up SSL
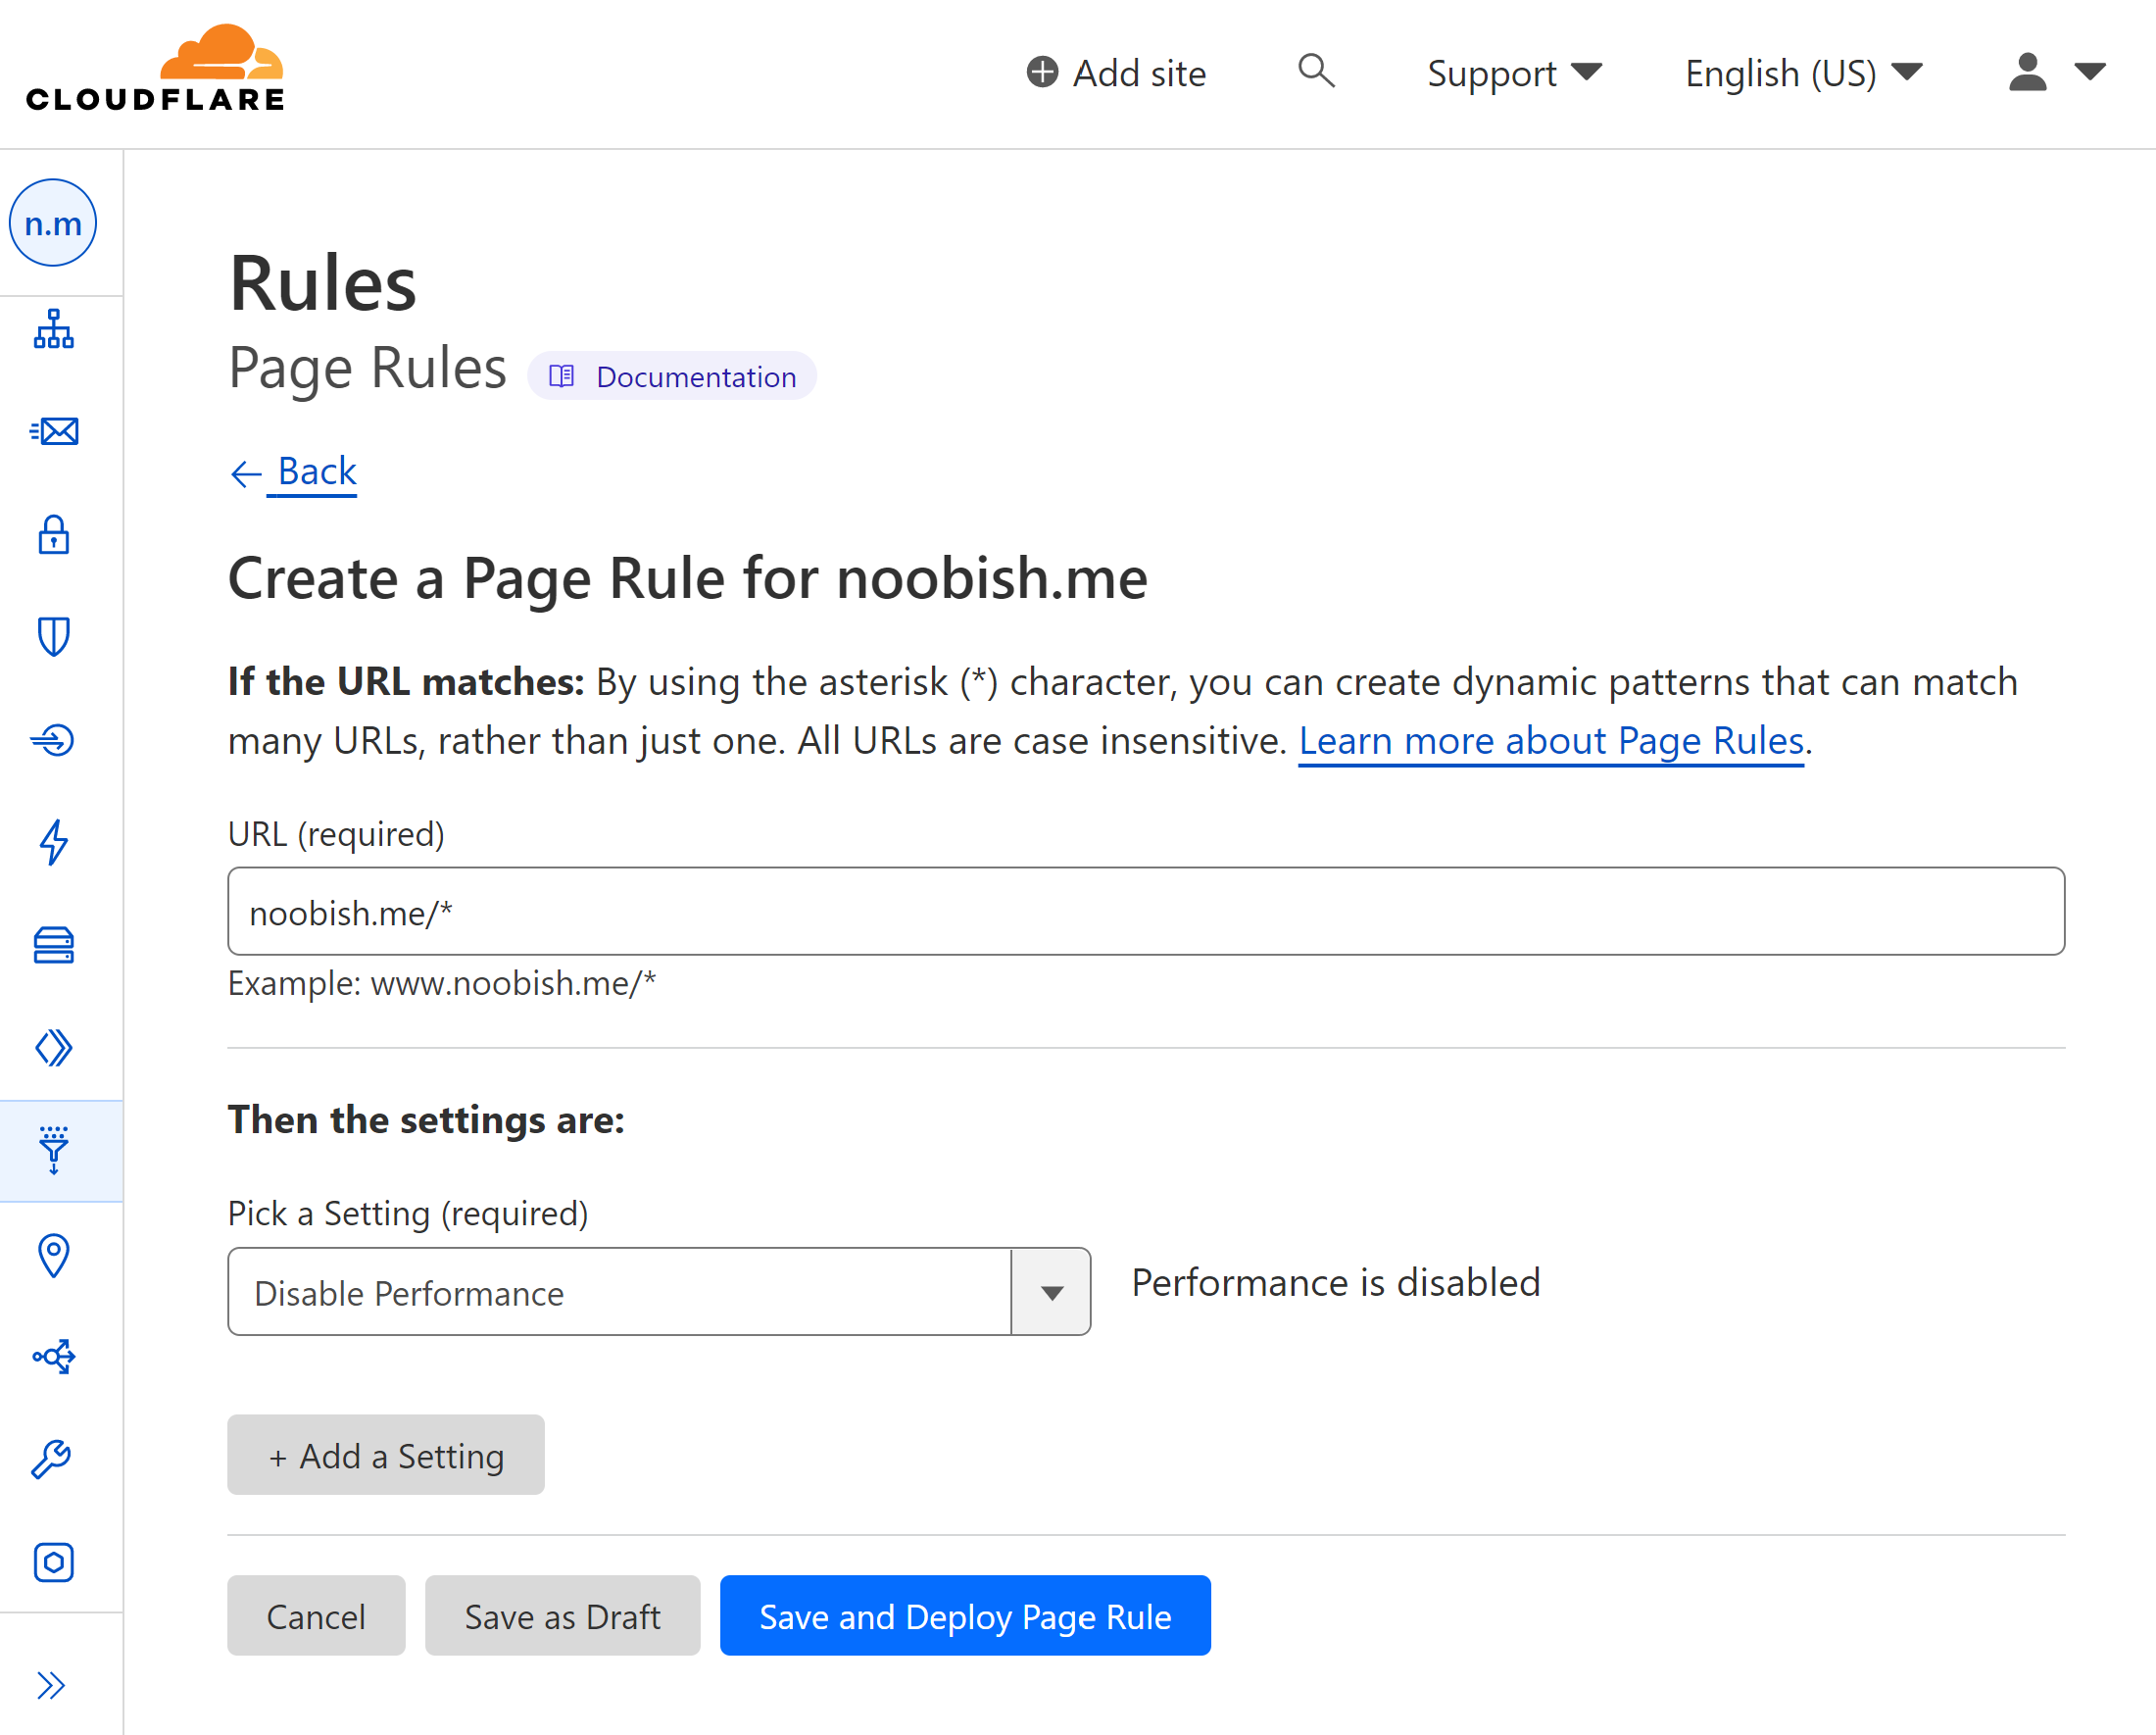
For my site I’m using Cloudflare’s nameservers to point the domain. In Cloudflare I set the SSL to Full or Full (strict).
I also create a Cloudflare Page Rule. Visit this post to learn why.
Here is another reference:
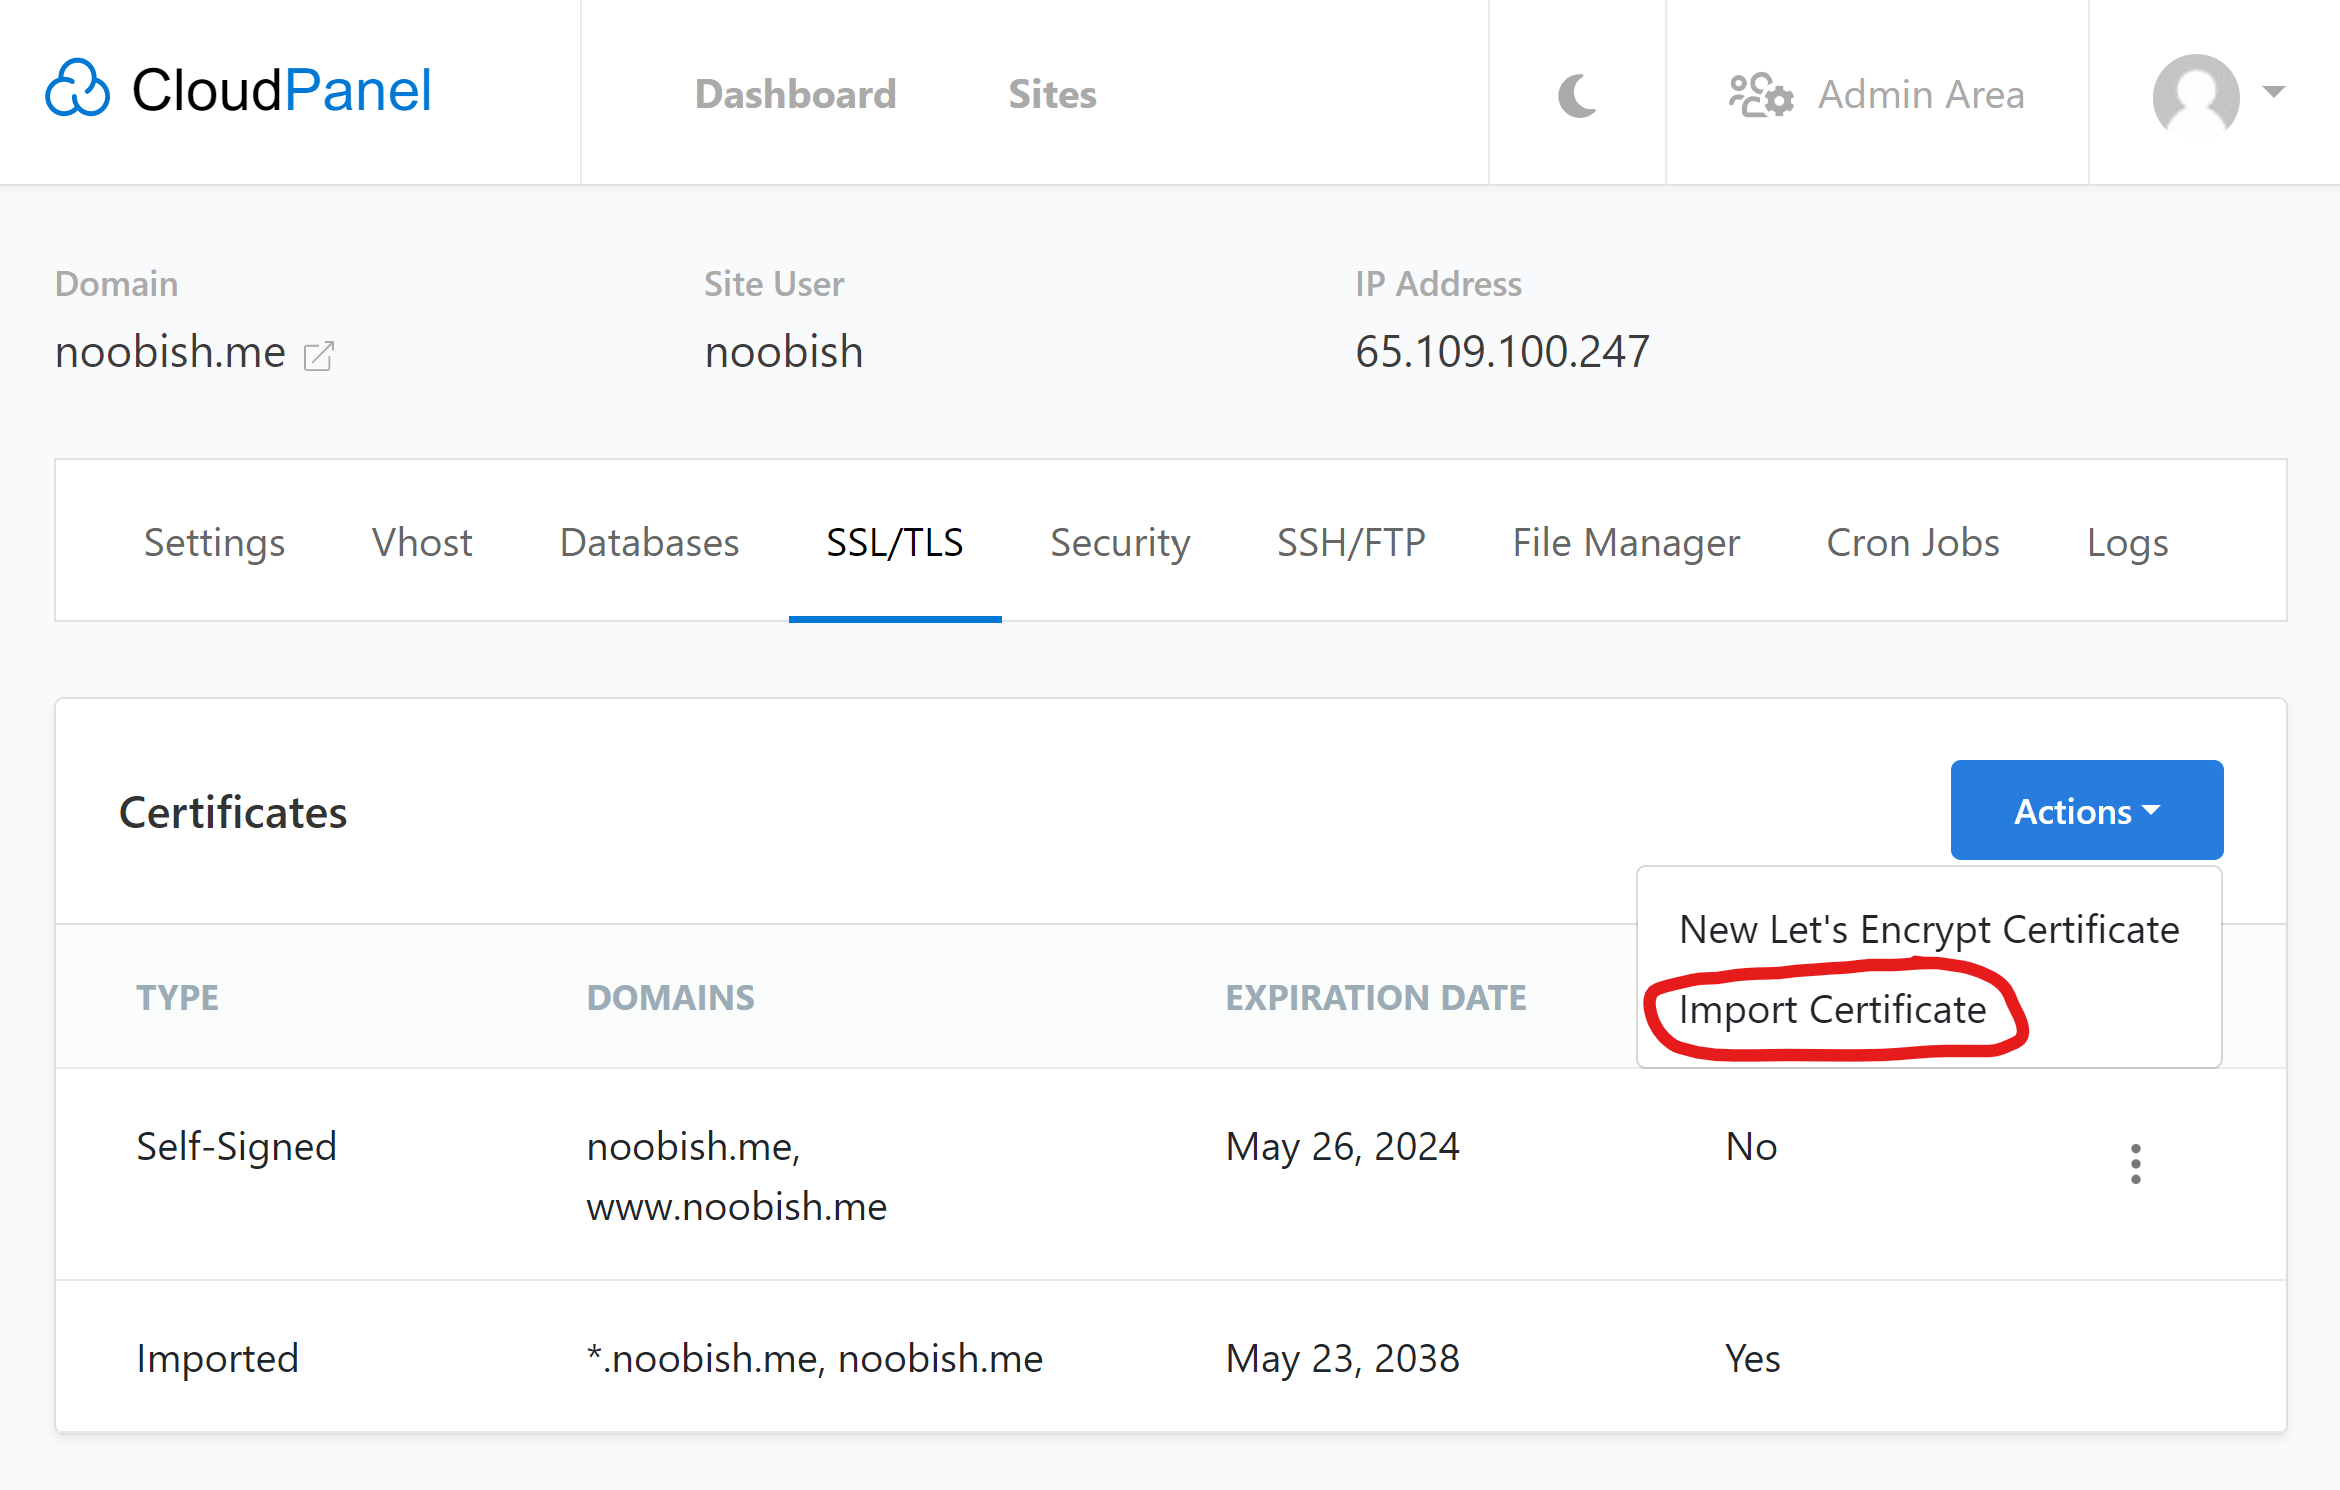
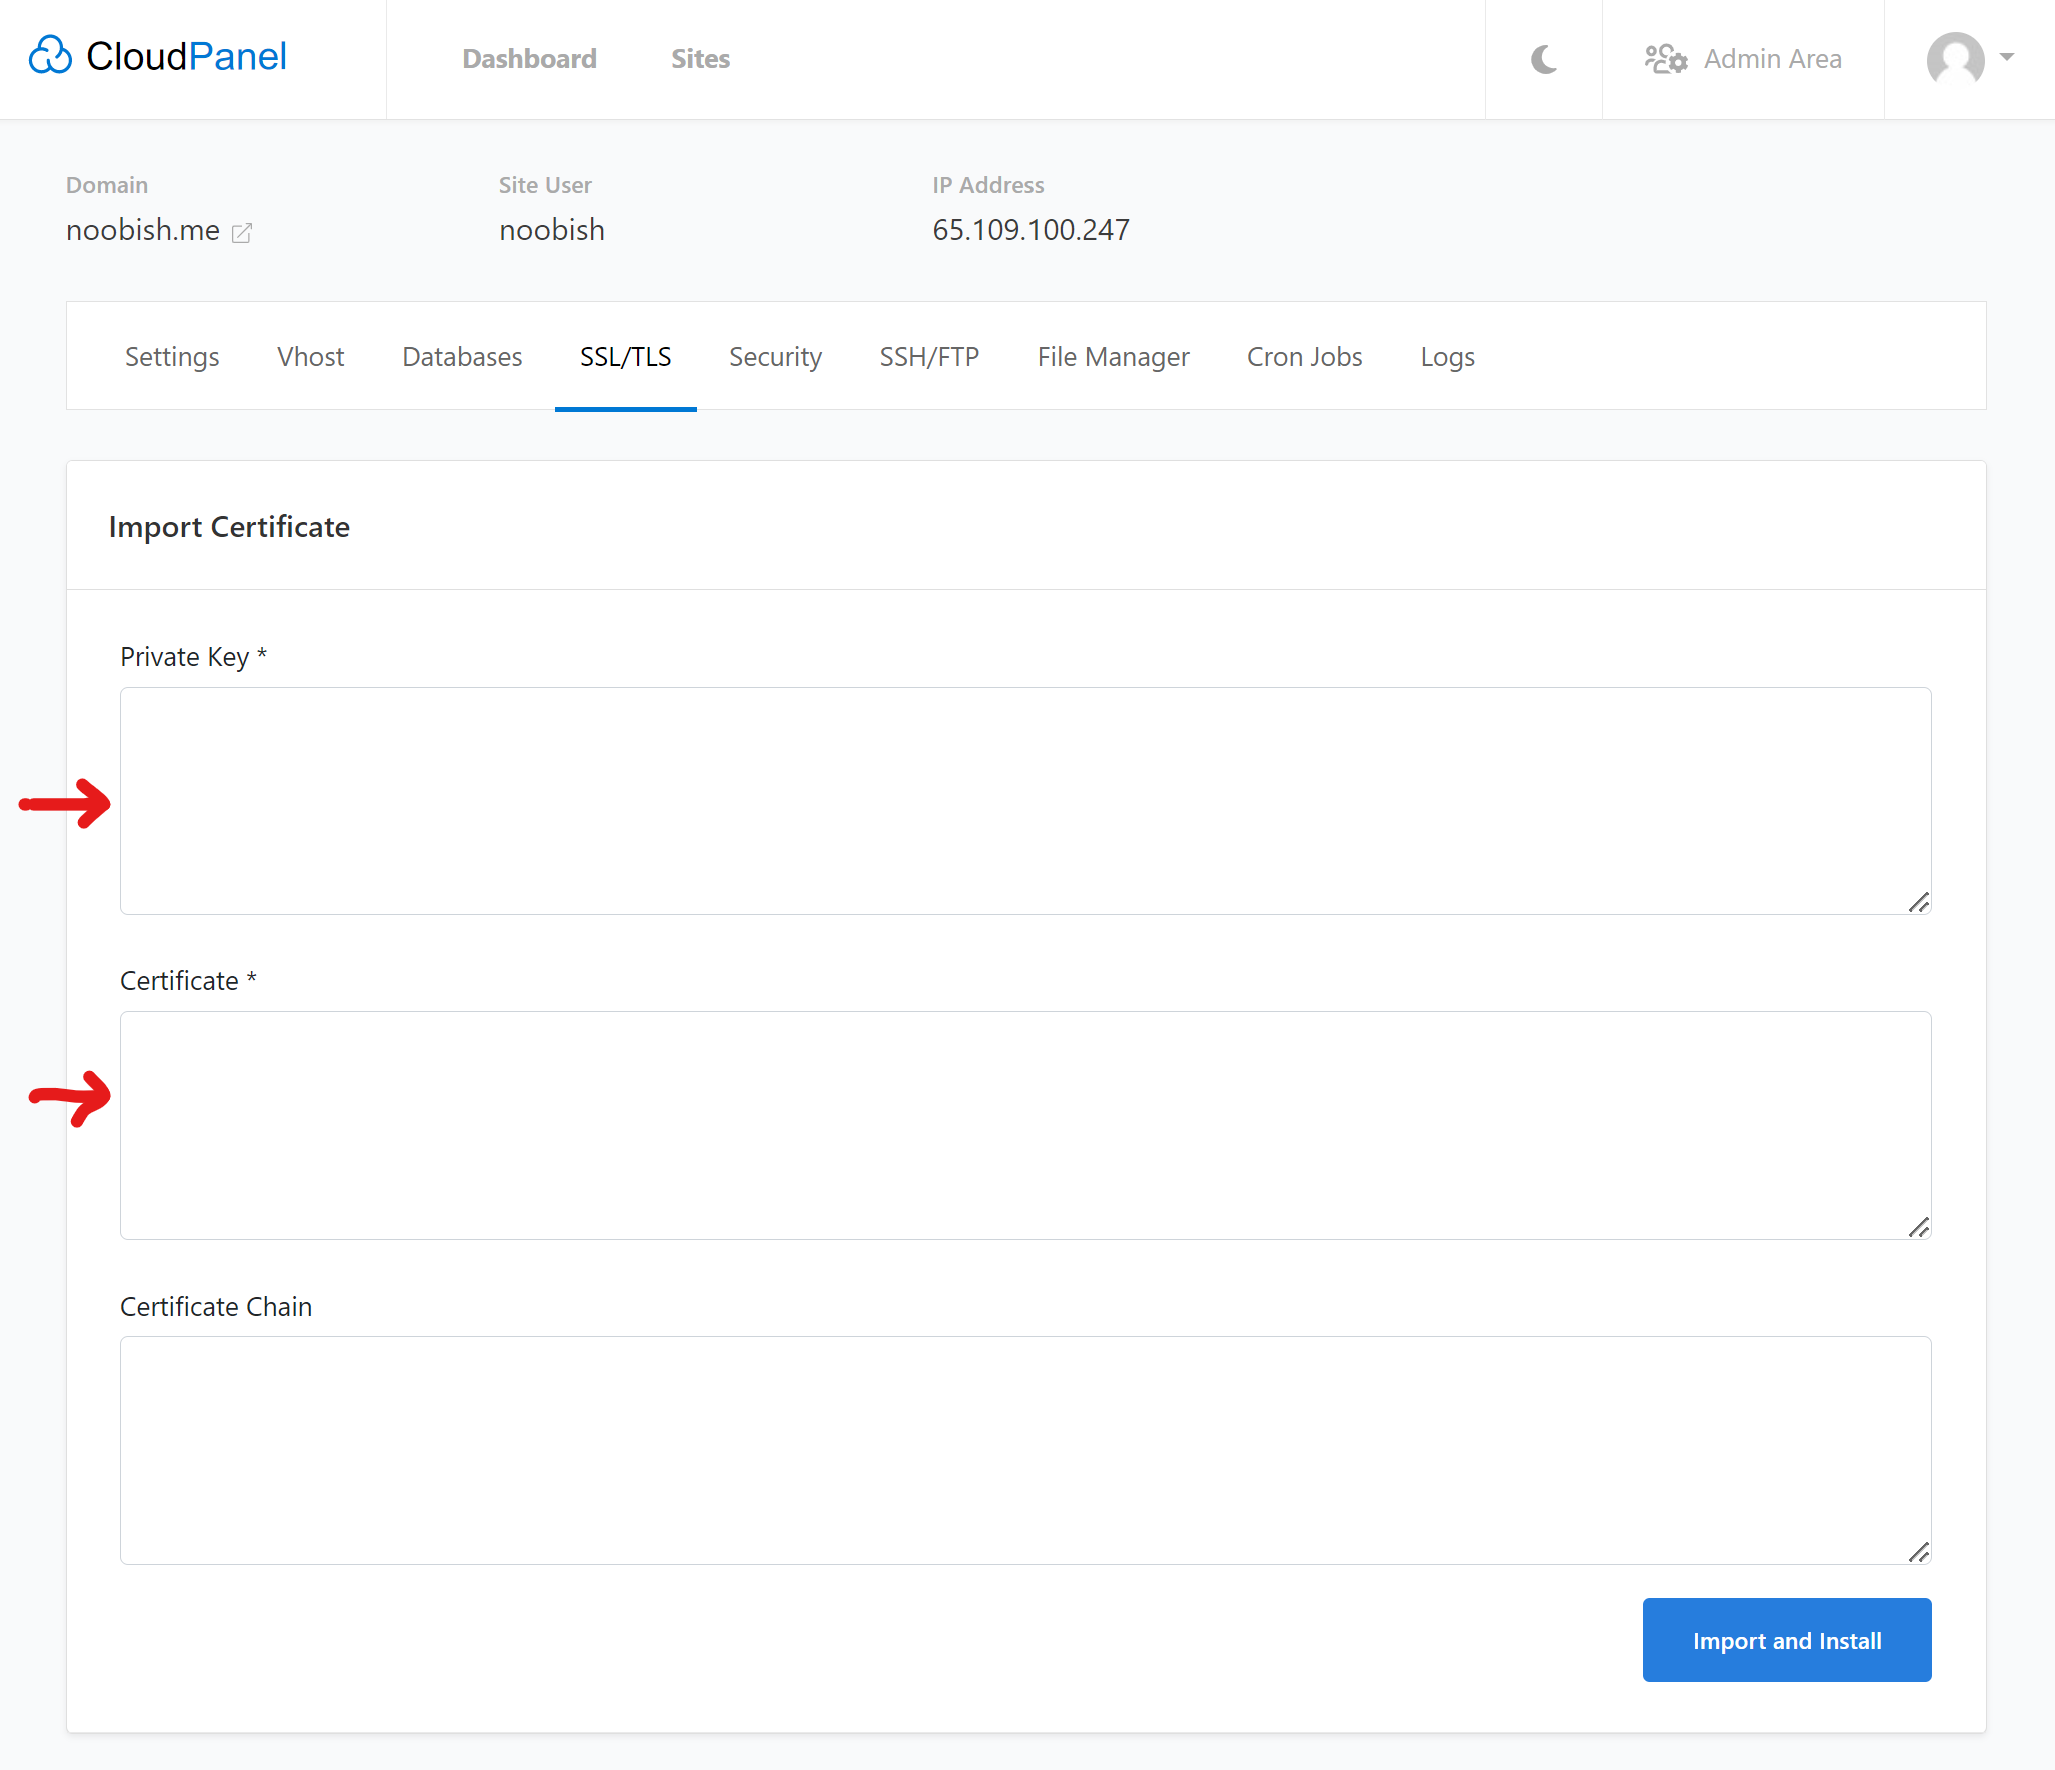
Cloudflare with Discourse: Setup Guide (WAF & Security Rules)I’m also using a free Cloudflare SSL Origin Certificate for my domain, which I “Import” into CloudPanel within the “SSL/TLS” site settings for that site (by simply pasting in both the Certificate and the Private Key I had downloaded for that domain name from my Cloudflare account.)

And then in Cloudflare, is to prevent the error …
… in Cloudflare we need to …
… and also in Cloudflare we need to do all these other things …
Install Discourse
Back in Putty (or other terminal), from the root directory (c d Enter to get back to the root) → Install the Discourse Standard Install using these commands…
git clone https://github.com/discourse/discourse_docker.git /var/discourse
Enter
cd /var/discourse
Enter
chmod 700 containers
Create the app.yml File
Now we copy the file /var/discourse/standalone.yml to /var/discourse/containers/ as app.yml before editing it according to our site settings…
cp /var/discourse/samples/standalone.yml /var/discourse/containers/app.yml
Edit the app.yml File
nano /var/discourse/containers/app.yml
In addition to modifying the app.yml file according to our specific site settings, we need to change 3 more things in that file before we save it:
Under the section templates: we need to add…
- "templates/web.socketed.template.yml"
Because I’m using Cloudflare, under the section templates: I also add…
- "templates/cloudflare.template.yml"
Under the section expose: we need to comment out (by adding a # to the beginning of the line, as below), or remove these two items…
  #- "80:80"   # http
  #- "443:443" # https
Under the section env: we need to add…
DISCOURSE_FORCE_HTTPS: true
Sample of app.yml (w/Cloudflare & Mailgun) - >
templates:
  - "templates/postgres.template.yml"
  - "templates/redis.template.yml"
  - "templates/web.template.yml"
  - "templates/web.ratelimited.template.yml"
  - "templates/web.socketed.template.yml"
  - "templates/cloudflare.template.yml"

params:
  db_default_text_search_config: "pg_catalog.english"
  db_shared_buffers: "4096MB"

env:
  DISCOURSE_CAN_PERMANENTLY_DELETE: true
  LC_ALL: en_US.UTF-8
  LANG: en_US.UTF-8
  LANGUAGE: en_US.UTF-8
  DISCOURSE_FORCE_HTTPS: true
  DISCOURSE_MAX_REQS_PER_IP_PER_10_SECONDS: 200
  DISCOURSE_MAX_REQS_PER_IP_PER_MINUTE: 400
  DISCOURSE_HOSTNAME: 'example.com'
  DISCOURSE_DEVELOPER_EMAILS: 'admin@example.com'
  DISCOURSE_SMTP_ADDRESS: smtp.mailgun.org
  DISCOURSE_SMTP_PORT: 587
  DISCOURSE_SMTP_USER_NAME: postmaster@example.com
  DISCOURSE_SMTP_PASSWORD:  xxxxxxxxxxxxxxx
  DISCOURSE_NOTIFICATION_EMAIL: noreply@example.com

volumes:
  - volume:
      host: /var/discourse/shared/standalone
      guest: /shared
  - volume:
      host: /var/discourse/shared/standalone/log/var-log
      guest: /var/log

hooks:
  after_code:
    - exec:
        cd: $home/plugins
        cmd:
          - git clone https://github.com/discourse/docker_manager.git
Then we save and exit the app.yml file…
CTRL-X
y
Enter
Next we set the permissions for the app.yml file…
chmod o-rwx /var/discourse/containers/app.yml
then…
Bootstrap the App
cd /var/discourse
./launcher bootstrap app
This will take a considerable amount of time. In the end of the bootstrap process, you’ll be asked to:
./launcher start app
Edit the Vhost File
Now we go back into our CloudPanel and paste the below code into the “Vhost Editor” for our Discourse site (overwriting what is already there). Of course replace yoursite.com with your actual domain name.
server {
  listen 443 ssl http2;
  listen [::]:443 ssl http2;
  {{ssl_certificate_key}}
  {{ssl_certificate}}
  server_name yoursite.com;
  {{root}}

  {{nginx_access_log}}
  {{nginx_error_log}}

  if ($scheme != "https") {
    rewrite ^ https://$host$uri permanent;
  }

  location ~ /.well-known {
    auth_basic off;
    allow all;
  }

  {{settings}}

  add_header Cache-Control no-transform;

  location / {
                proxy_pass http://unix:/var/discourse/shared/standalone/nginx.http.sock:;
                proxy_set_header Host $http_host;
                proxy_http_version 1.1;
                proxy_set_header X-Forwarded-For $proxy_add_x_forwarded_for;
                proxy_set_header X-Forwarded-Proto $scheme;
                proxy_set_header X-Real-IP $remote_addr;

  }
}
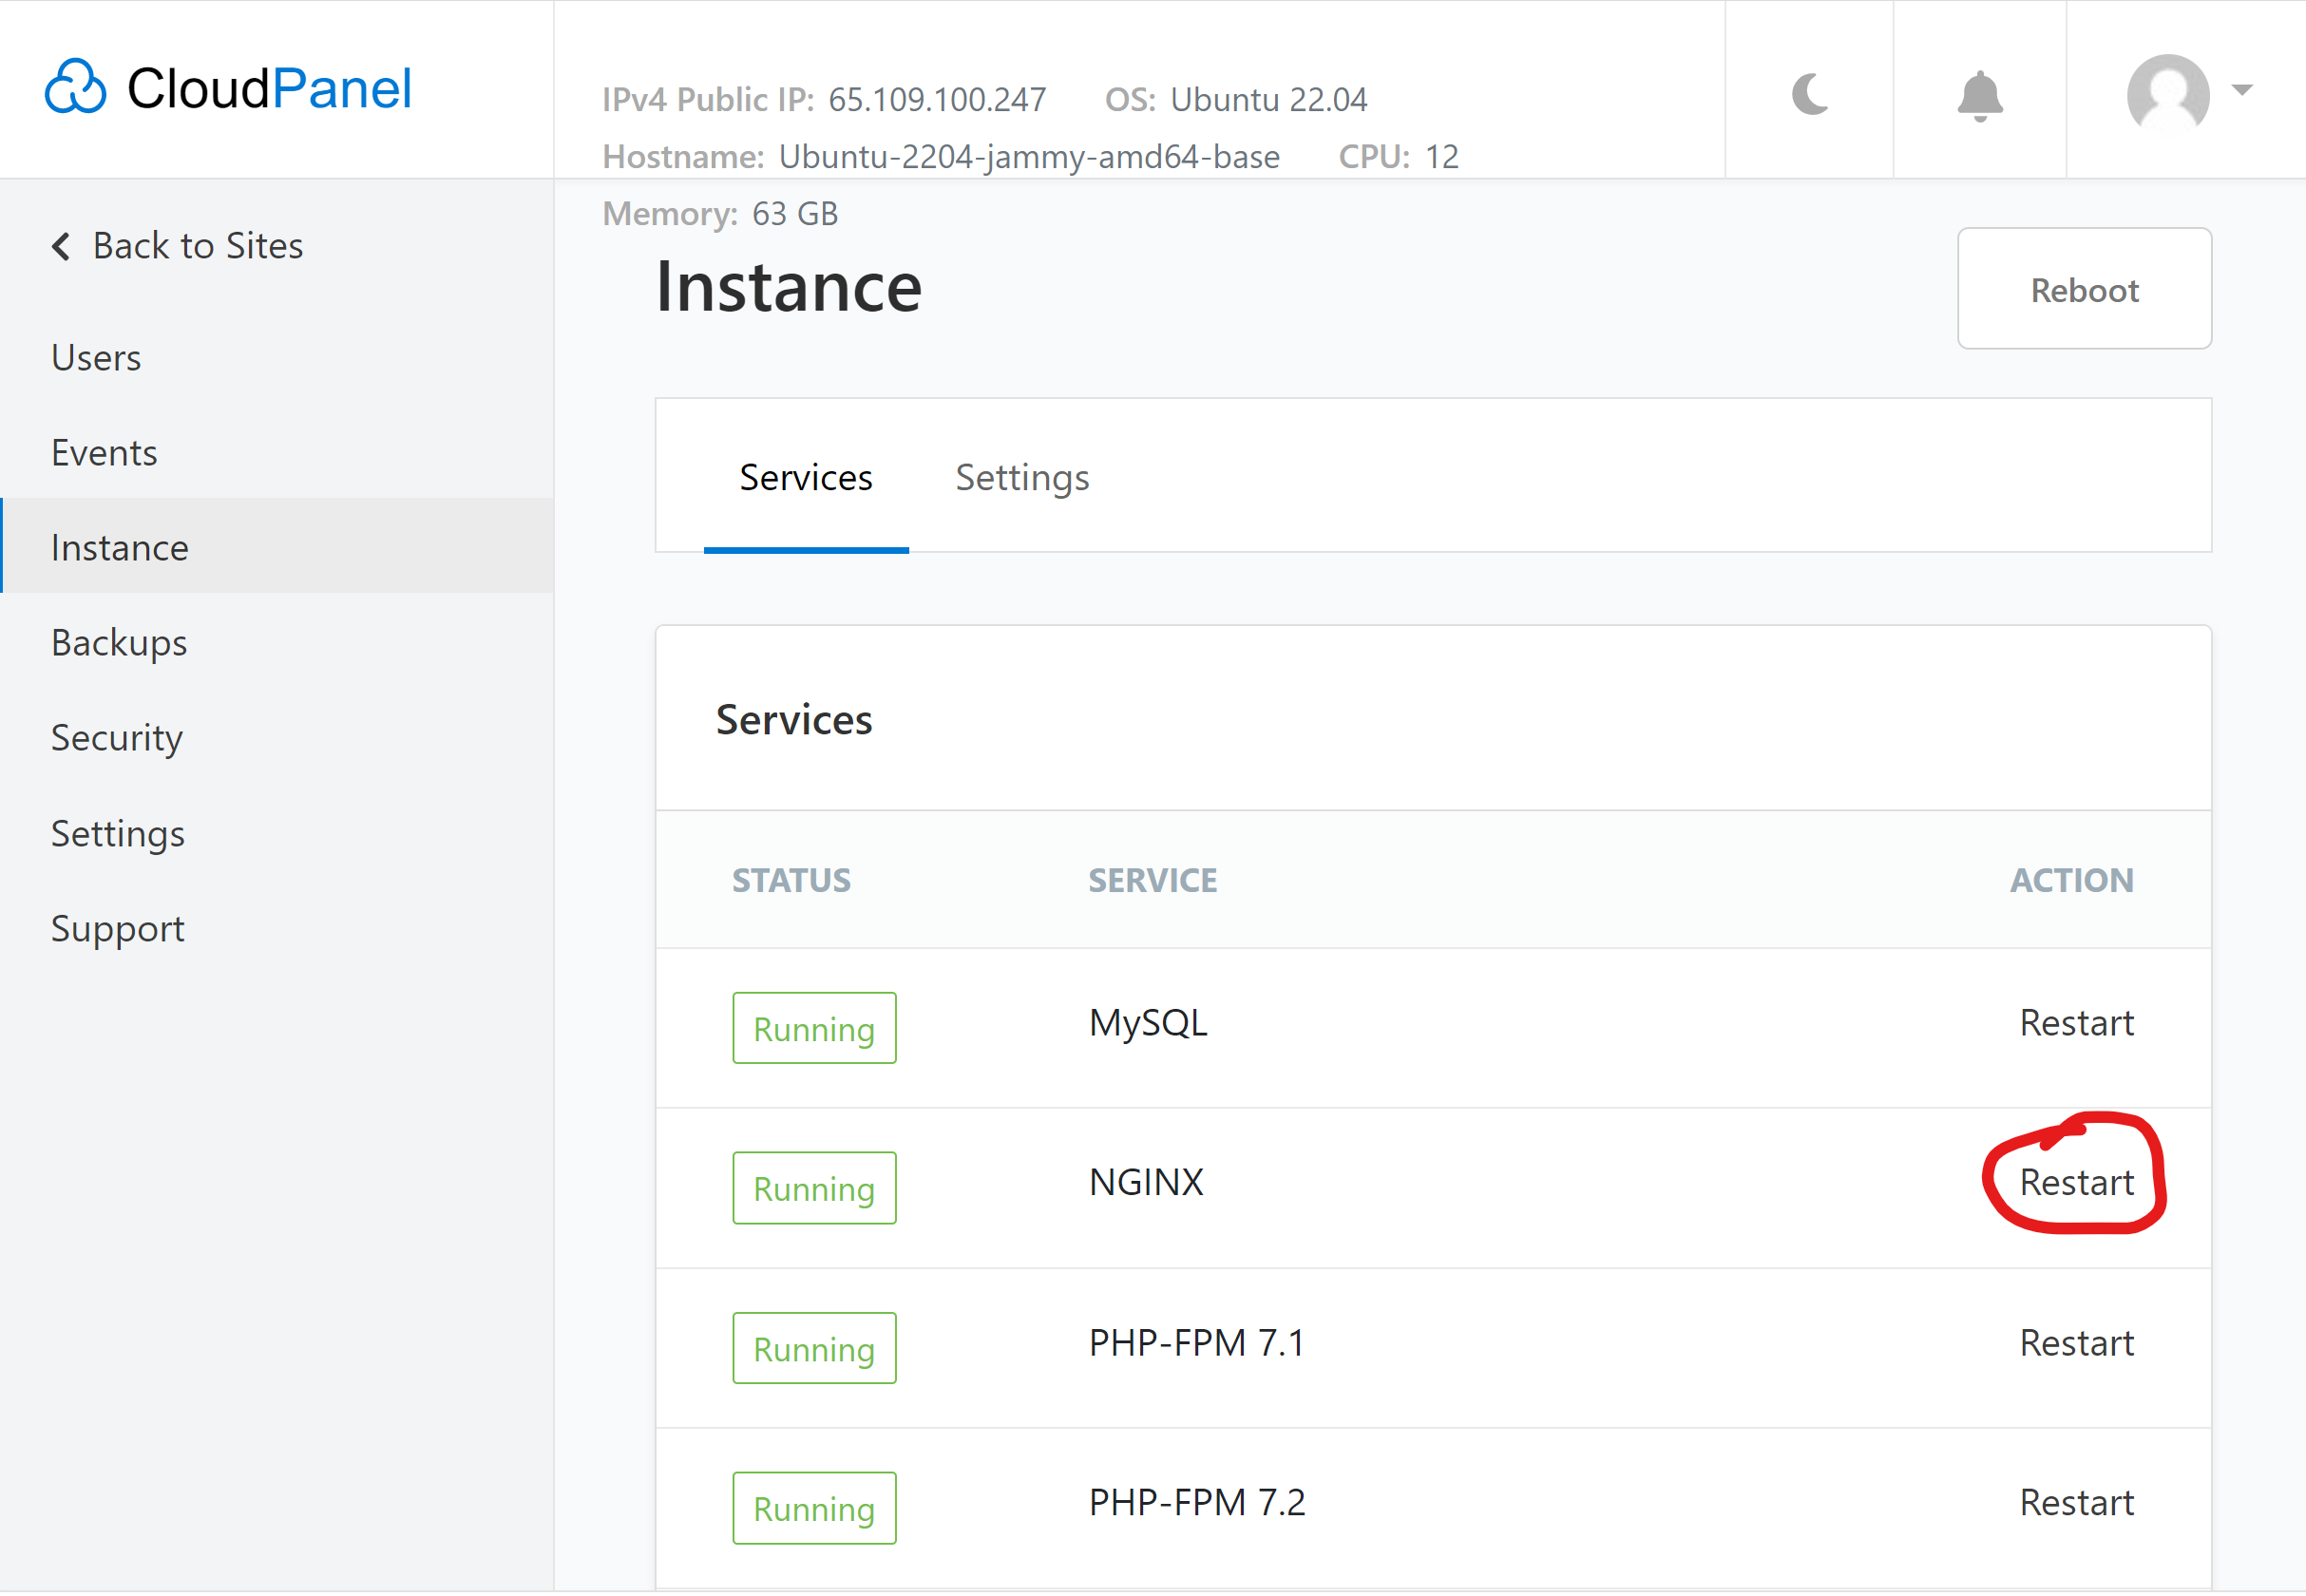
Restart Nginx
Next we need to restart Nginx, which we can do by clicking a button in the Admin Area of the CloudPanel…
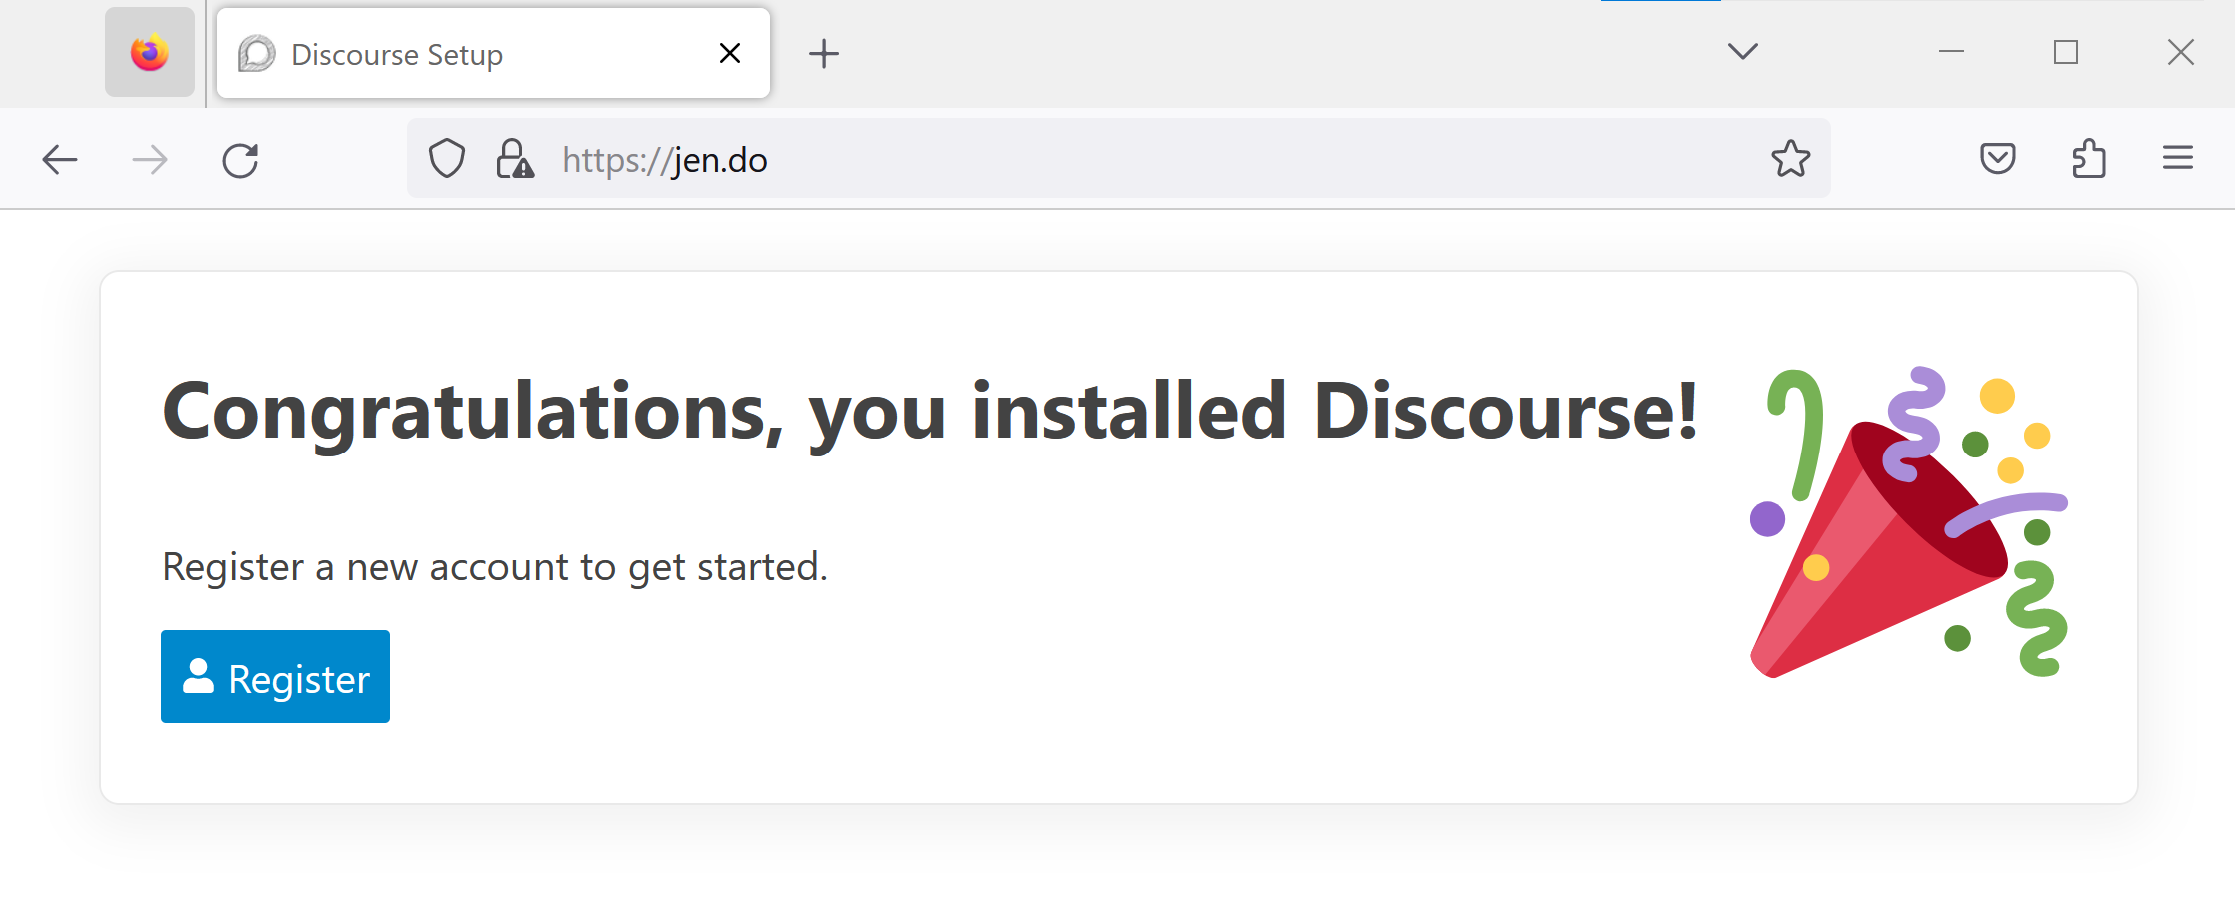
Congratulations!
Now, in our browser, we can go to our site’s URL and run the Discourse Setup Wizard…
Cohabitate Peacefully
Now I can self-host and manage my Discourse site right along side my Ghost, Wordpress, Drupal and other types of sites using a clean and lean management panel, with minimal need going forward to use the terminal/command line.
To Allow Site in External iFrames
Or, you can include this at the end of your app.yml:
- exec: rails r "SiteSetting.allow_embedding_site_in_an_iframe=true"
Also…
(Might need to) do this in Cloudflare…

Enable Sub-Sub-Categories
cd /var/discourse
Enter
./launcher enter app
Enter
rails c
Enter
SiteSetting.max_category_nesting=3
Enter
exit
Enter
exit
Or, you can include this at the end of your app.yml:
- exec: rails r "SiteSetting.max_category_nesting=3"